Posted on

TIG Welding Chrome Moly Chassis

The vega wagon S&W chrome moly chassis came off the jig table for the final TIG weld up.

vega-wagon-chassis-tig-welded

Currently we are putting all the parts back into the chassis for final tabs and electrical placement etc.

vega-wagon-engine

The wagon skin is shown below. We have been doing final trimming of excess sheetmetal and grinding and detailing of the inside of body and primer applied. Plus we made the front mounts for the Glasstek 6″ stretched fiberglass front end.

vega-wagon-body-detached

Next we will make the fuel cell mount, NOS bottle mount, fire system bottle holder etc.

vega-wagon-chassis-tig-welded-2

The final chassis weld up is looking good.

vega-wagon-chassis-suspension

vega-wagon-chassis

Below shows the battery box is in. Now we simply need to setup the master shut-off switch mount and put the body back on.

vega-wagon-battery-holder

Posted on

1936 Plymouth Coupe Suspension And Chassis Tuning

plymouth coupe

We are in the final stages of this “daily driver” build.

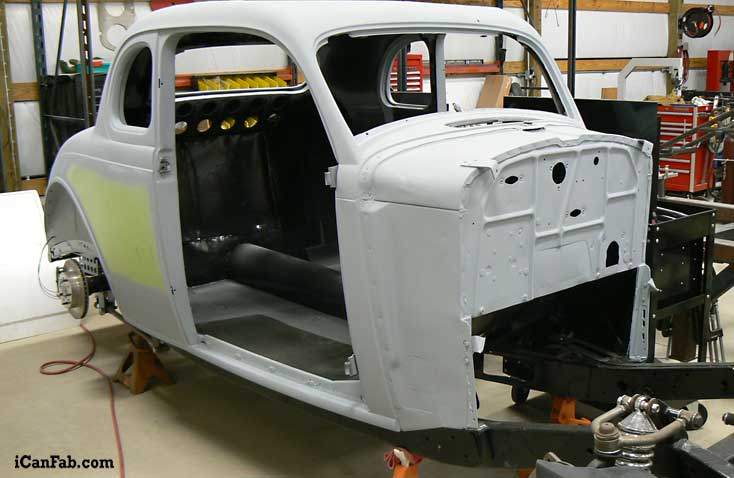
Currently we are trying to find a body shop to bondo up the 80 year old sheet metal.  We have already taken it down to bare metal and applied primer to simply prevent further rusting.

1936-coupe-body

As seen in the photo below, the front suspension is sporting a special front brake kit. It’s not easy to find — but it allows the wheels to turn left and right without scrubbing the front fenders.

suspension

Plymouth coupe

Below photo shows the inside of the firewall. As you can see we still have a few holes to seal up — but that is what final assembly before paint is all about.

coupe-wiring

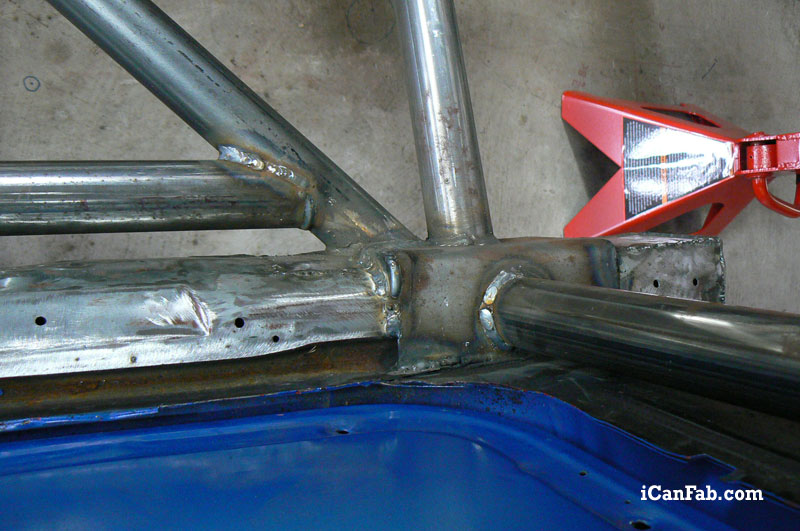
The front floor section and tunnel is continuous welded – as seen in below photo.

1936-coupe-floor

Below shows the rear floor and sealed off bulkhead from the trunk.

1936-plymouth-coupe-floor-backseat

The trunk floor section on the right is removable via DZUS fasteners. The raised floor is for the panhard bar upper mount — we want the car low.

1936-coupe-floor-back

Below shows the rear end — a FORD 9″ on coilover shocks with street rod 4-link suspension and disk brakes.

1936-coupe-rearend

This Street Rod is going to be a great daily driver  — and the coolest car in the parking lot!

Posted on

Chassis and suspension design for high performance

engine placement

This 1933 Plymouth Coupe project will be a multipurpose Hot Rod once complete.

The project photos below document the chassis and suspension fabrication. When finished this Coupe will be a street car.  You will be able to drive this car on the street. Plus when you feel like it . . . you can drive the car to the race track and make a few passes if you feel the need!

Engine placement is critical. Weight, balance, and the center of gravity  — these are all important factors to consider.

engine placement

The photo below shows the Floor X and drive shaft loops.

coupe-fabrication2

The photo below shows us sizing up a tire.

coupe-fabrication3

The photo below shows — we have room for Zomie exhaust.

coupe-fabrication4

Bracing is important also making it NHRA legal, as seen in the below photos.

coupe-fabrication5

coupe-fabrication6

coupe-fabrication7

coupe-fabrication6

Almost done adding tubing, just a few more pieces. See kids math does matter! Pay attention in school and you too can become a mechanic, fabricator and all-around Hot Rodder!

FOR SALE

Posted on

Chassis fabrication project is quickly progressing

The formula for successful chassis fabrication includes proper project management.

1972 CHEVY VEGA UPDATE: The photo below shows the RCI 5-gallon fuel cell has been placed against a rear bulkhead surrounded by 3/4-inch tubing.
iCanFab builds Chevy Vega racer

Below shows the Aerospace drag race break kit

good-brake

The FORD 9″ center chunk Aluminum Daytona support and a 1350 U/Joint size.

9 inch rear

4.56 rear end gears

9 inch rear end gears

The below photo shows the chassis and suspension roof bar that was added. This car will handle 1200 horsepower once finished this additional bar was added for strength.

Vega project

iCanFab builds Chevy Vega racer

Having the proper metal fabrication tools are very important when building a chassis and suspension like this. We need to get each stage of the project done within an specific time range if we are going to stay on schedule and within budget so we can sell this car for a reasonable price.

Below you will see tubing outriggers from frame rails to main hoop base.

We modified both left and right sides of our S & W full 2×3 frame.

good-outriggers

Below additional sill bar has been added for NHRA compliance.

iCanFab builds Chevy Vega racer

S & W Race Cars full 2×3 frame

iCanFab builds Chevy Vega racer

The below photos show the floor X and drive shaft loops. We added the X in the floor base for additional safety.

Chevy Vega project

Vega project

These photos show the S & W Race Cars full 2×3 frame and S & W ladder bars front crossmember with brackets

Vega project

Vega project

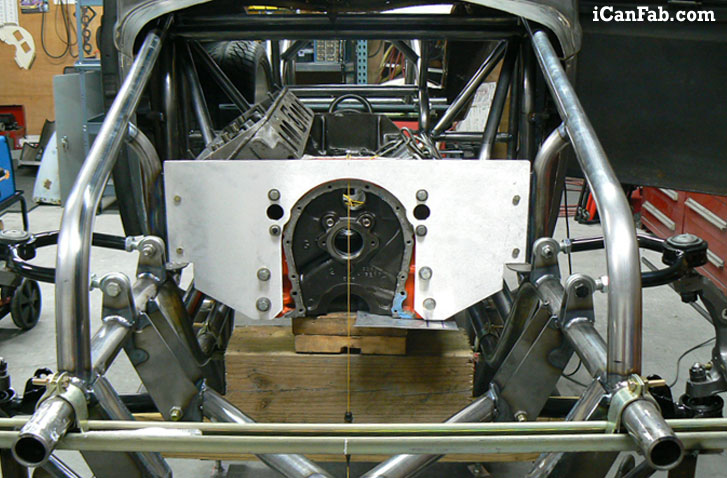
Below shows the right front motor plate mount. This drag car will be perfect for engine swaps.  Once finished this radial tire car will be able to handle up to 1200 HP.

Vega project

Below shows the steel dummy block in place.

iCanFab builds Chevy Vega racer

A doghouse was made since this engine was set back over 4″

iCanFab builds Chevy Vega racer

It looks like this Vega is ready for a firewall.

iCanFab builds Chevy Vega racer